If you are building Android apps in 2026 and still writing XML layouts — you are making your life harder than it needs to be.
Jetpack Compose is the modern way to build Android UI. Google made it. Google recommends it. And most Android jobs now require it.
In this tutorial, you will learn:
- What Jetpack Compose actually is
- How it is different from the old XML way
- How to set up your first Compose project
- How to write your first
@Composablefunction - How
@Previewworks
No complicated theory. Just simple explanations and code you can run.
What is Jetpack Compose?
Jetpack Compose is a UI toolkit for Android. It lets you build your app screens using Kotlin code instead of XML files.
Before Compose, building a screen looked like this:
- Create an XML layout file
- Write Kotlin/Java code to find views by ID
- Connect them together with
findViewByIdor View Binding - Update views manually when data changes
With Compose, you just write Kotlin functions. That’s it. No XML. No findViewById. No view binding.
// This is a complete screen in Compose
@Composable
fun Greeting() {
    Text("Hello, World!")
}
One function. One line. Done.
Compose vs XML — What Changed?
Let’s compare the same thing in both approaches.
Showing a name on screen
Old way (XML + Kotlin):
<!-- layout/activity_main.xml -->
<TextView
    android:id="@+id/nameText"
    android:layout_width="wrap_content"
    android:layout_height="wrap_content"
    android:text="Hello" />
// MainActivity.kt
class MainActivity : AppCompatActivity() {
    override fun onCreate(savedInstanceState: Bundle?) {
        super.onCreate(savedInstanceState)
        setContentView(R.layout.activity_main)

        val nameText = findViewById<TextView>(R.id.nameText)
        nameText.text = "Hello, Kemal"
    }
}
Two files. You need to keep the XML and Kotlin in sync. If you change the ID in XML but forget to update Kotlin — crash.
New way (Compose):
@Composable
fun Greeting(name: String) {
    Text("Hello, $name")
}
One file. One function. The data and the UI live together.
The Big Differences
| XML Way | Compose Way | |
|---|---|---|
| UI written in | XML files | Kotlin functions |
| Files needed | XML + Kotlin (2 files per screen) | Just Kotlin (1 file) |
| Updating the UI | Manual (textView.text = "...") | Automatic (change state, UI updates) |
| Finding views | findViewById or ViewBinding | Not needed |
| Preview | Slow (need to run the app) | Instant @Preview in Android Studio |
| Learning curve | Learn XML + Kotlin separately | Just Kotlin |
Setting Up Your First Compose Project
Step 1: Open Android Studio
You need Android Studio Hedgehog or newer. If you have an older version, update it first.
Step 2: Create a New Project
- Click New Project
- Choose Empty Activity (not “Empty Views Activity” — that is the old XML way)
- Name your project (for example:
ComposeBasics) - Language: Kotlin
- Minimum SDK: API 24 (covers 99% of devices)
- Click Finish
Android Studio creates everything for you. The project already has Compose set up.
Step 3: Look at What You Got
Open MainActivity.kt. You will see something like this:
class MainActivity : ComponentActivity() {
    override fun onCreate(savedInstanceState: Bundle?) {
        super.onCreate(savedInstanceState)
        setContent {
            MyAppTheme {
                Greeting("Android")
            }
        }
    }
}

@Composable
fun Greeting(name: String) {
    Text(text = "Hello $name!")
}
Notice there is no setContentView(R.layout.something). Instead, you have setContent { }. Everything inside that block is Compose.
Your First @Composable Function
A @Composable function is just a Kotlin function with the @Composable annotation. It describes what should appear on screen.
@Composable
fun WelcomeMessage() {
    Text("Welcome to Jetpack Compose!")
}
Rules for Composable functions:
- They must have the
@Composableannotation - They don’t return anything (no
returnstatement) - They describe UI — they don’t create objects
- By convention, they start with a capital letter (like
WelcomeMessage, notwelcomeMessage)
Composables Can Take Parameters
Just like any Kotlin function:
@Composable
fun UserCard(name: String, email: String) {
    Column {
        Text(text = name, fontSize = 20.sp)
        Text(text = email, fontSize = 14.sp)
    }
}
Now you can use it anywhere:
UserCard(name = "Kemal", email = "kemal@example.com")
UserCard(name = "Alex", email = "alex@example.com")
Same function, different data. This is the power of Compose — your UI is just functions.
Composables Can Call Other Composables
You build complex screens by combining simple Composables:
@Composable
fun HomeScreen() {
    Column {
        WelcomeMessage()
        UserCard(name = "Kemal", email = "kemal@example.com")
        UserCard(name = "Alex", email = "alex@example.com")
    }
}
Start small. Combine. Build up. That is how every Compose screen works.
How @Preview Works
You don’t need to run the app to see your UI. Android Studio can show a preview right in the editor.
@Preview(showBackground = true)
@Composable
fun GreetingPreview() {
    WelcomeMessage()
}
Click the Split or Design tab in Android Studio and you will see the preview instantly.
Preview Tips
You can customize previews:
// Show with a background
@Preview(showBackground = true)

// Show the full system UI (status bar, navigation bar)
@Preview(showSystemUi = true)

// Dark mode preview
@Preview(uiMode = Configuration.UI_MODE_NIGHT_YES)

// Custom size
@Preview(widthDp = 320, heightDp = 640)
You can have multiple previews for the same Composable:
@Preview(showBackground = true, name = "Light Mode")
@Composable
fun LightPreview() {
    MyAppTheme { UserCard("Kemal", "kemal@example.com") }
}

@Preview(showBackground = true, uiMode = Configuration.UI_MODE_NIGHT_YES, name = "Dark Mode")
@Composable
fun DarkPreview() {
    MyAppTheme { UserCard("Kemal", "kemal@example.com") }
}
This lets you check light mode and dark mode at the same time without running the app.
Let’s Build Something: A Simple Profile Card
Let’s put everything together and build a profile card.
@Composable
fun ProfileCard(name: String, title: String) {
    Column(
        modifier = Modifier
            .fillMaxWidth()
            .padding(16.dp),
        horizontalAlignment = Alignment.CenterHorizontally
    ) {
        // Profile icon placeholder
        Box(
            modifier = Modifier
                .size(80.dp)
                .background(
                    color = MaterialTheme.colorScheme.primary,
                    shape = CircleShape
                ),
            contentAlignment = Alignment.Center
        ) {
            Text(
                text = name.firstOrNull()?.toString() ?: "?",
                color = Color.White,
                fontSize = 32.sp
            )
        }

        Spacer(modifier = Modifier.height(12.dp))

        Text(
            text = name,
            fontSize = 22.sp,
            fontWeight = FontWeight.Bold
        )

        Text(
            text = title,
            fontSize = 14.sp,
            color = MaterialTheme.colorScheme.onSurfaceVariant
        )
    }
}
Use it like this:
setContent {
    MyAppTheme {
        ProfileCard(
            name = "Kemal",
            title = "Android Developer"
        )
    }
}
Preview it:
@Preview(showBackground = true)
@Composable
fun ProfileCardPreview() {
    MyAppTheme {
        ProfileCard(name = "Kemal", title = "Android Developer")
    }
}
You just built a real UI component. No XML. No findViewById. Just Kotlin.
Common Questions
Do I need to learn XML first?
No. If you are starting new, go straight to Compose. XML is the old way and it is not going anywhere, but all new Android projects should use Compose.
Can I use Compose in an existing XML project?
Yes. You can add Compose to an existing project and use it side by side with XML. You don’t need to rewrite everything at once.
Is Compose ready for production?
Yes. Compose has been stable since 2021. Google uses it in their own apps (Gmail, Play Store, Maps). Most companies have already switched or are switching.
Does Compose work with Java?
No. Compose requires Kotlin. If your project is still in Java, you need to migrate to Kotlin first (or use Compose only in new Kotlin files).
Quick Summary
| Concept | What It Means |
|---|---|
| Jetpack Compose | Modern Android UI toolkit — write UI in Kotlin |
| @Composable | Annotation that marks a function as a UI component |
| @Preview | Shows your UI in Android Studio without running the app |
| setContent | Replaces setContentView — the entry point for Compose |
| No XML needed | UI and logic live together in one Kotlin file |
Result
Here is what the app looks like when you run the code from this tutorial:
| Light Mode | Dark Mode |
|---|---|
 | 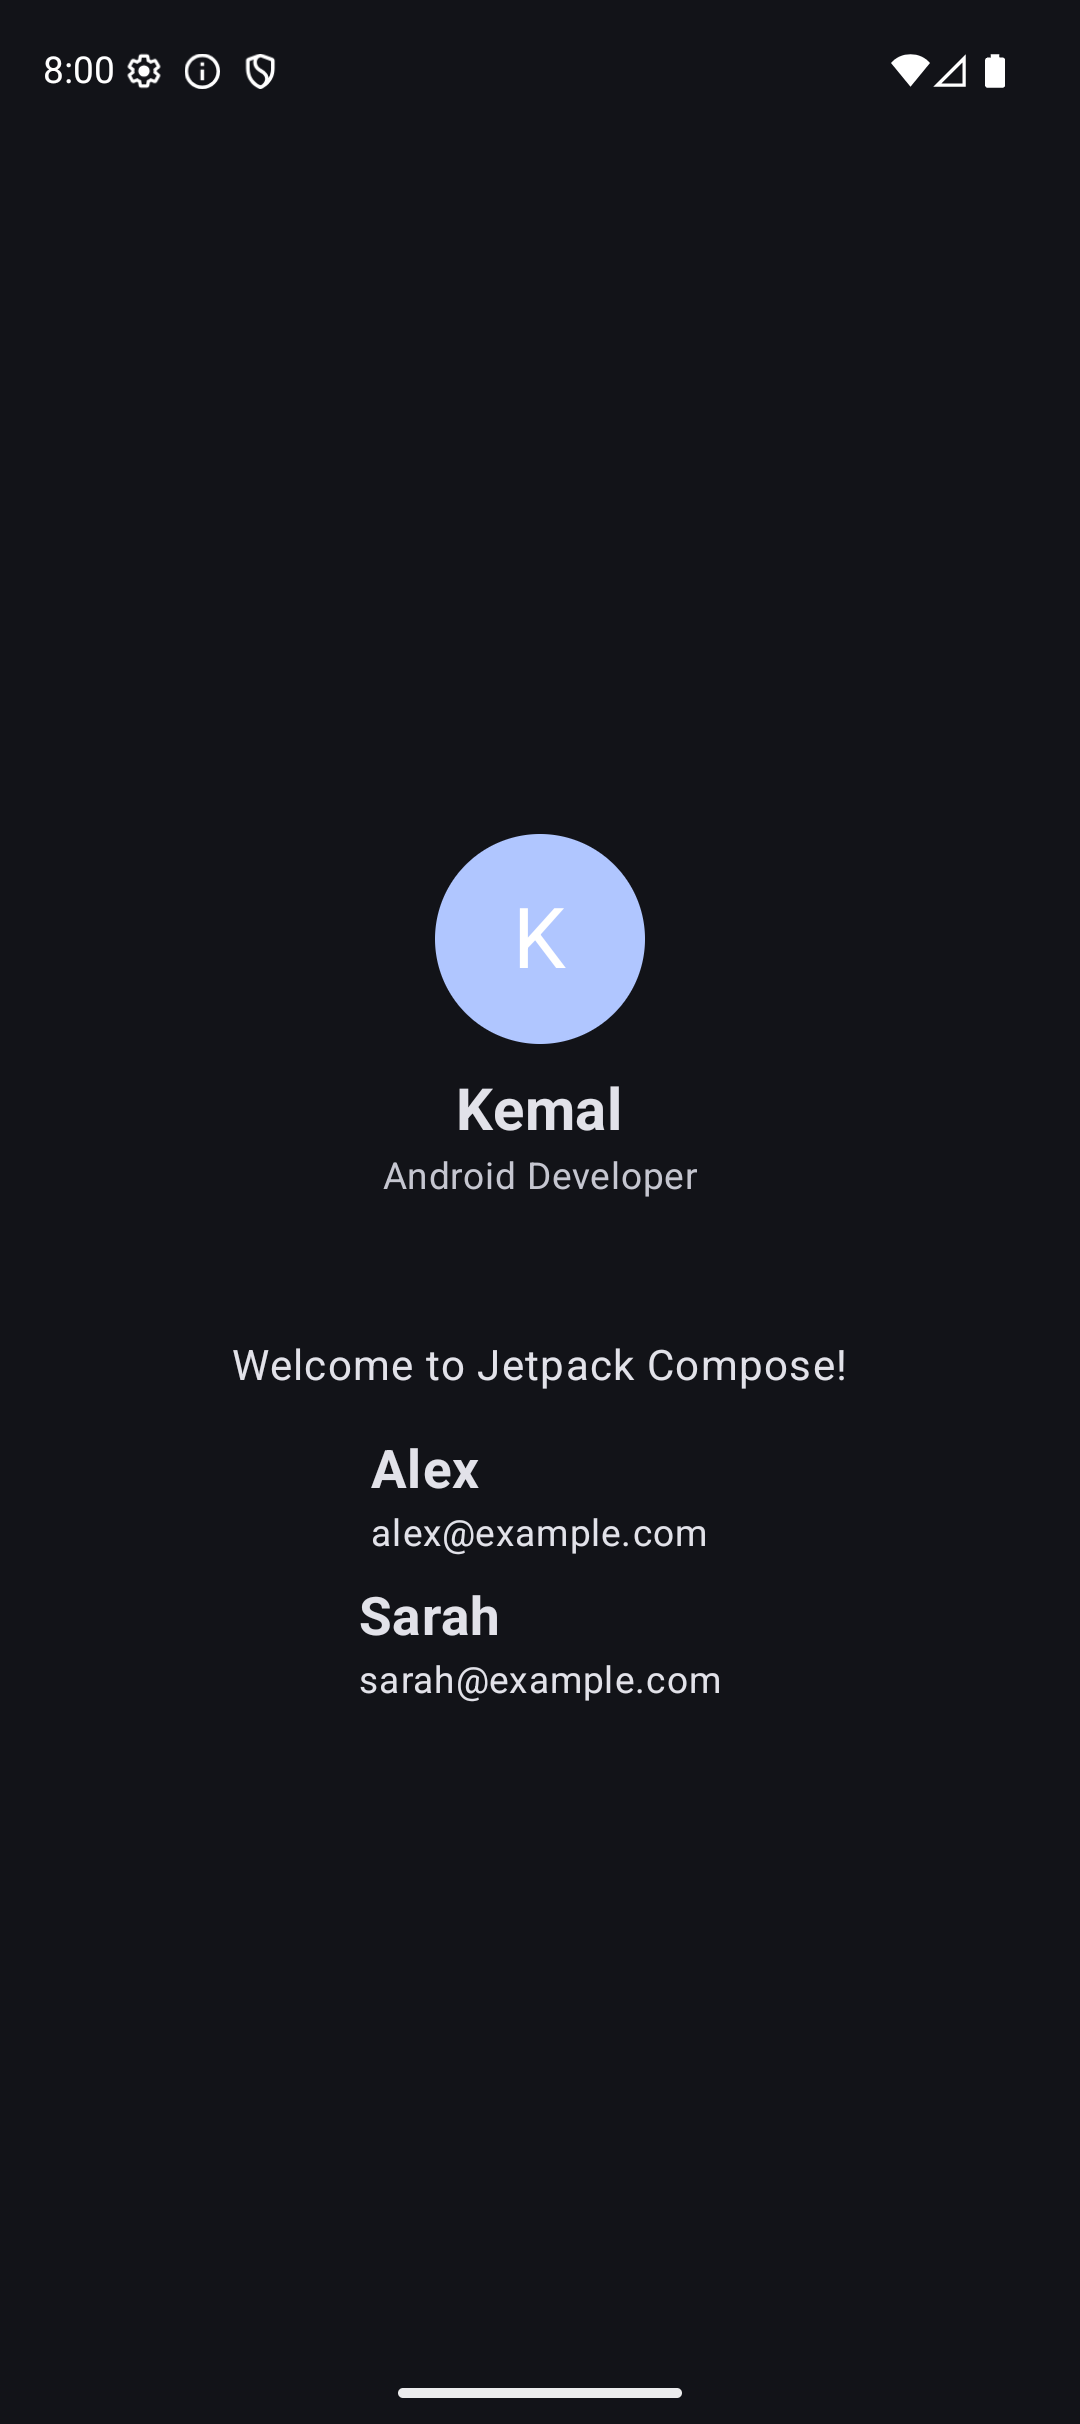 |
Source Code
The complete working code for this tutorial is on GitHub. Clone it and run it in Android Studio:
What’s Next?
In the next tutorial, we will learn about layouts in Compose — how to arrange things on screen using Column, Row, and Box. These are the building blocks for every screen you will ever build.
See you there.